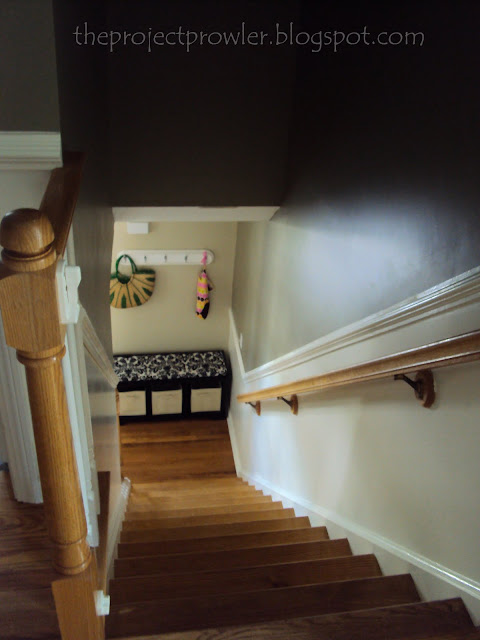
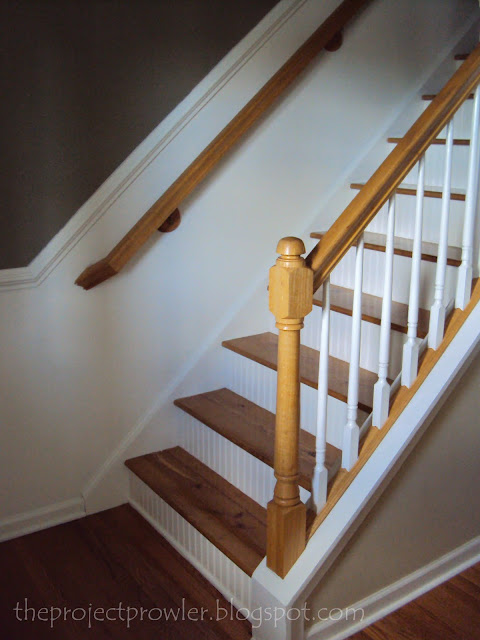
It's DONE, can you believe it!?!?!? It has been a long two weeks. But we finished the stairs, AND the hallway. . . AND added a new little pottery barn style bench for the foyer. I must say, that the hard part was that we had to do all our work at night so the kiddies wouldn't touch the walls, or be in the middle of a mess, or have the exposed outlets all around. So after they would fall asleep we would work like elves until we dropped, then we would have to put everything away until the next night when we could do a second coat, or more poly or whatever the next night needed. It was tiring work for a prego lady and a busy husband, but we are so thrilled with the outcome. It was a while ago that my hubs and I pulled up the hallway carpet, so let me give you a reminder of the "before" upstairs hallway:
The new floors were nice, but still hardly enjoyable with the tattered, pale walls
until. . . .
{Ahhhh} MUCH better, huh!? And here are the stairs new stairs:
And, some close ups of the bench (good thing my mother in law was here to whip up an awesome cushion for it in no time):
I can't say enough how much I am loving the final product, and how much I am loving having this project behind me. It really add to the look of our house, and seems to make all the rooms around it look a little more put together. We have been working towards updating our hallway for a while (see Here and Here) and It feels like it is officially done, and I have never been so exhausted in my life :)
Some things I have learned while doing the stairs:
Most carpeted stairs have a pine tread that is not "stain-grade" so use a wood conditioner before applying the stain. It will soak in more evenly and richer on the soft pine wood.
Also, if you plan to paint as well, do in this order: pull up carpet, paint walls/trim, sand stairs, stain, poly, then apply a pre-painted beadboard and finish with touch ups. The order we did our project in wasn't the smartest. Doing the stairs first was what we needed to do to realize what really needed to be done with the surroundings. But I wouldn't recommend that. Our plan was sort of unfolding as we were working, so we had to do some touch ups on the stair treads after we were done.
Don't get hung up on the knicks or cracks or stratches in the wood. I was so worried about all the imprefections until I saw the Thrifty Decor Chic's stair project and read her advice. It is true, Once your stairs as a whole are finished you won't even notice it. Even with our lighter stain, now that the whole scene is finishes you can hardly notice that totally damaged stair near the bottom. It all blends in and it all adds character and charm. I didn't even fill the holes left by the staples. Stainable woodfiller really isn't as stainable as they say. It never stains the same as the wood, so we left it out, and the holes are much less noticable that way.
Sand really good. Even if it's a pain and even if you don't want to, just do a little more. It will look so much better. Also, use an orbital sander. Your life will be much easier. Our corner cat sometimes leaves vibration marks on wood that are hard to get rid of, but the orbital sander is fast, smooth and easy to use. We borrowed one, but I think, after seeing how well it worked, it will be our next tool purchase.
For those of you who are Interested the process for the stairs went as follows:
1. Remove carpet/padding
2. Use pliers to remove all carpet staples from the stair treads (if you are putting bead board up you dont need to remove the staples from the risers because it will all be covered, you can just hammer them in).
3. Use a sander (orbital is preferable because it works fast, gives and even sand, and can get right up to those edges where all the paint from the trim is dried to. I like to feel each stair as I go to know how much sanding i need to do. You want a smooth surface to stain.
4. Clean stairs with a vacuum and damp cloth to make sure all the dust is up.
5. Apply a wood conditioner per the instructions on the label.
6. Stain stairs desired color (we needed ours light so we only did one coat, but you may need more coats to get the richness you need).
7. After stain has dried (per the instructions on the label), place a high durability polyurethane over top. (we wanted to use the poly/stain combo, but the lady at home depot said that it was not great for high traffic areas or floors, so we opted to do a separate poly and stain. But the poly will say on the back label if it is suitable for flooring.
8. Repeat coats of poly several times sanding in between. We did 5 coats of polyurethane on our stairs. Make sure to do it at a time where you have adequate time to let it dry without stepping on it. Doing it before bed worked great for us, it was plenty dry by morning.
9. Paint bead board desired color.
10. Measure and cut to fit the size of risers
11. Apply with finishing nail gun.
12. Caulk any edges that don't quite match up and fill all nail holes with wood filler
13. Finish up with a little touch up paint over the filled nail holes and cracks, and you are DONE!!!
Now, let's here those carpets being torn from the floor!!! ;)


11 comments:
Looks fabulous Kim!
It's perfect!!! You did an amazing job. You are so inspiring!
Can you come to my house and rescue me? You're a great interior designer!!
It's AMAZING!! The stairs, the trim, the hallway, wow!
The finished product looks awesome! Love the wall color, stain...the entire combination! I have to ask, if you guys did all of this work while the kids were in bed, how did they sleep through the sanding noise?!?!
Whoa! That looks amazing! I'm wondering the same thing...how do you do all of that pregnant with 3 little kids??
Thanks everyone! I am loving it everytime I look at it, it is such an accomplishment!
Phaneth--I did not pull out staples, or sand while the kids were in bed. They were watching a movie. It was mostly the wet stuff we did while they were sleeping-- painting and poly. I took the kids out for a few hours while the husband put up the chair rail. But I must say that my youngest has learned to take naps to the sound of a nail gun pretty well! I don't know how she does it!
All the hardwork has paid off! And, to do while pregnant?? Even more amazing! You guys should get your own tv show on HGTV ;)
I echo your friend Phaneth--you need your own show. I just can't believe how amazing it looks. If we were staying in this house I would do it in an instant (well, and if I could convince my husband--how do you convince him to do all this stuff?). But I am convinced that I will be moved by spring (even if my husband isn't). I NEED to be out West--closer to family. But I seriously adore your floors, stairs, paint color (you HAVE to tell me what color paint that is) and everything else. I am determined to do some upgrades in my house soon and all because of you!
It all looks amazing! The stairs, the hallway, the new bench...I absolutely love them all. Well done!
oh my GOODNESS! That looks amazing! Who knew that stairs and a hallway could look so good. i would never have considered a remodeling project on those areas of my house, but now i will. Not for this house. Maybe our next one. :)
Post a Comment